10 Essential Rapid Prototyping Techniques for 2025
Discover the top 10 rapid prototyping techniques designers and engineers use. Explore methods from 3D printing to digital tools for faster innovation.
In the world of product development, speed and accuracy are paramount. The ability to quickly transform a digital concept into a tangible object or an interactive experience can mean the difference between market leadership and falling behind. This is where rapid prototyping techniques come into play, serving as the critical bridge between imagination and functional reality.
Choosing the right method is crucial for success. An engineer validating a mechanical part has vastly different needs than a UX designer testing a user flow. This guide is designed to clarify that choice. We will break down 10 of the most essential and effective rapid prototyping techniques used by innovators today, spanning both physical and digital domains.
You will learn the specific strengths, weaknesses, material options, and ideal use cases for each approach. From high-tech additive manufacturing and CNC machining to foundational methods like paper prototyping and Wizard of Oz testing, this roundup provides the actionable insights you need. Our goal is to empower you to select the best prototyping superpower for your project, helping you accelerate your innovation cycle and bring superior products to market, faster. We will cover a range of techniques, including 3D Printing, CNC Machining, Injection Molding, and even Digital Prototyping.
1. 3D Printing (Additive Manufacturing)
Among the most revolutionary rapid prototyping techniques, 3D printing (also known as additive manufacturing) builds physical objects directly from digital CAD models. The process works by adding material layer-by-layer, which allows for the creation of intricate and complex geometries that would be impossible or prohibitively expensive to produce with traditional subtractive methods. This technique has fundamentally changed how product developers move from concept to tangible part.
How It Works and When to Use It
3D printing encompasses various technologies, each suited for different applications. Fused Deposition Modeling (FDM) is excellent for early-stage, low-cost concept models, while Stereolithography (SLA) offers high-resolution, smooth finishes ideal for aesthetic prototypes. For functional parts requiring strength, Selective Laser Sintering (SLS) is a common choice. This versatility makes 3D printing perfect for creating form-fit prototypes, functional test parts, and even end-use components, as seen in GE Aviation's 3D-printed fuel nozzles.
Actionable Tips for Implementation
To make the most of this rapid prototyping technique, consider these strategies:
- Optimize Part Orientation: Position your model in the build software to minimize the need for support structures. This reduces material waste, printing time, and post-processing effort.
- Design for Additive: Leverage the technology's strengths by incorporating complex internal lattices to reduce weight without sacrificing strength, or by consolidating multiple components into a single printed part.
- Start Simple: Use a low-cost FDM printer for initial form and fit checks before committing to more expensive, high-resolution methods like SLA or DMLS for final prototypes.
The infographic below summarizes key metrics for 3D printing as a rapid prototyping solution.
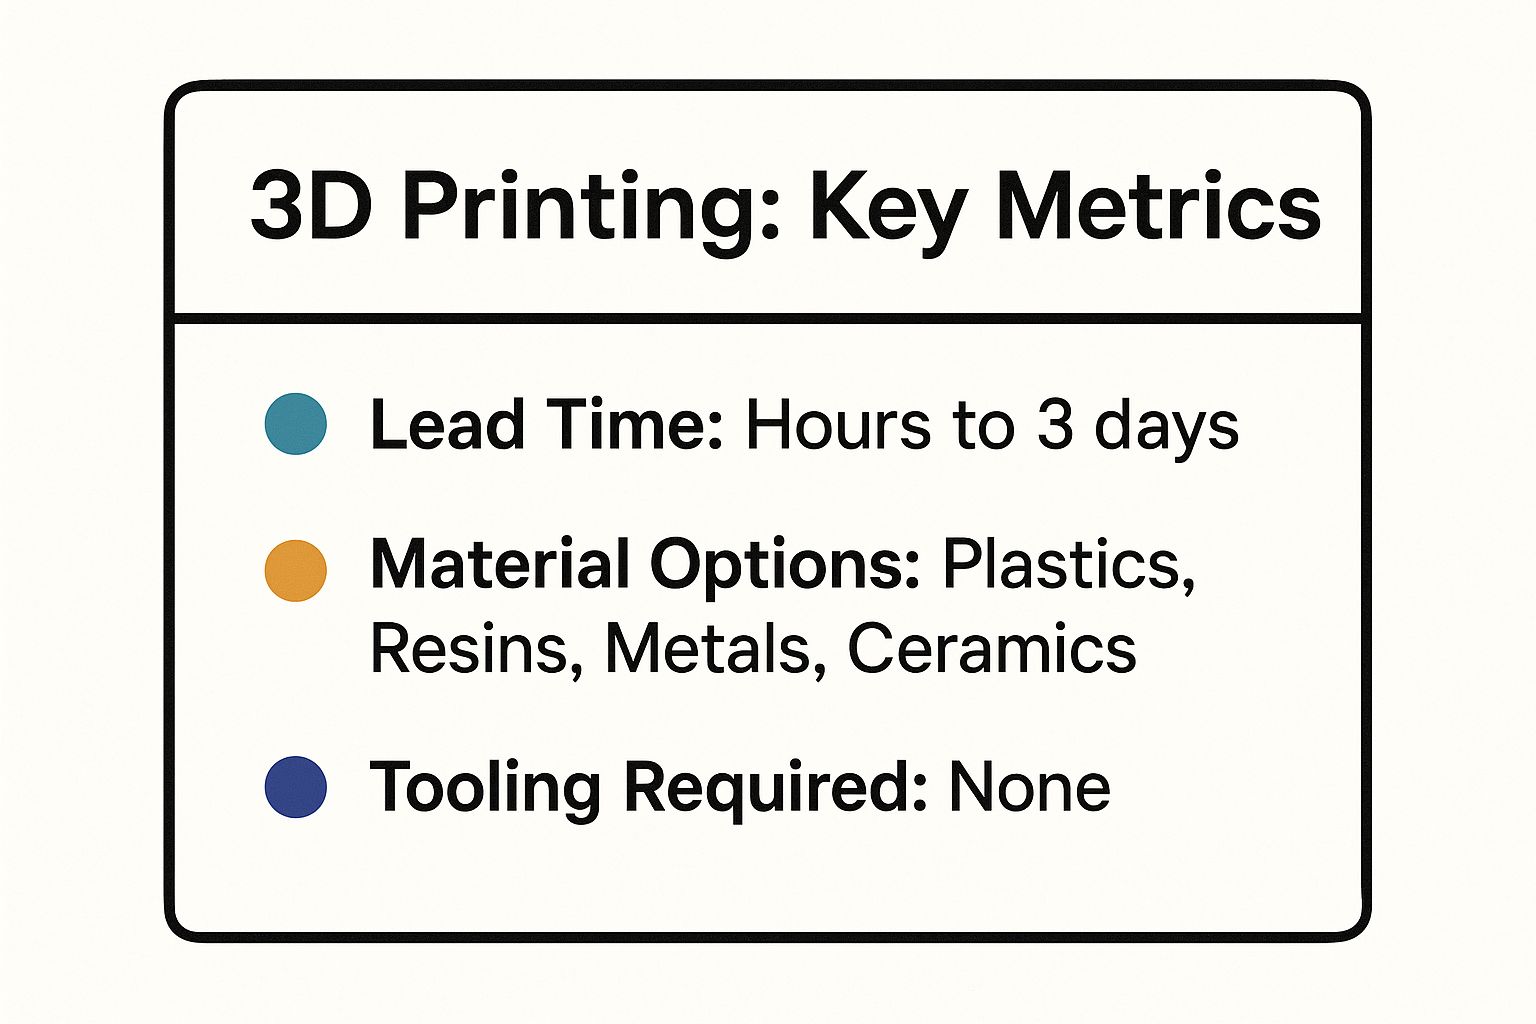
The data highlights why 3D printing is a go-to method: its incredibly fast lead times and the complete elimination of tooling costs make it exceptionally agile for iterative design.
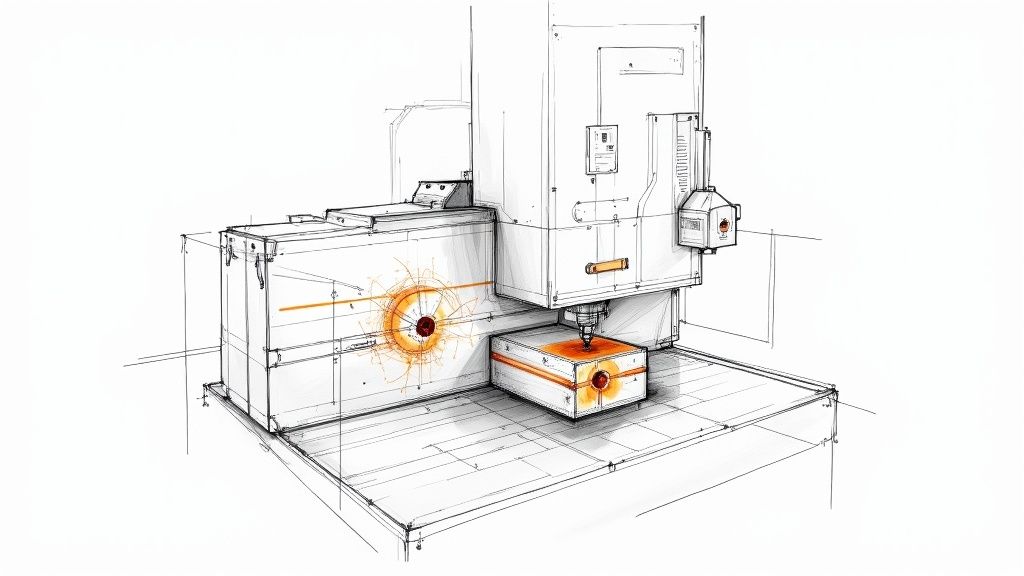
2. CNC Machining
As a cornerstone of subtractive manufacturing, CNC (Computer Numerical Control) machining offers unparalleled precision and material versatility. Unlike additive methods, this process starts with a solid block of material (like metal or plastic) and uses computer-controlled cutting tools to precisely remove excess material, carving out the final part. This technique is renowned for producing high-fidelity prototypes with excellent mechanical properties, closely mirroring mass-produced components.
How It Works and When to Use It
CNC machining reads a digital design file and translates it into instructions for cutting tools. Operations like milling, turning, and drilling are performed with incredible accuracy. This method is the ideal choice when a prototype must possess the strength and surface finish of a final product. For example, Apple famously uses CNC machining to create the unibody enclosures for MacBook prototypes, ensuring a perfect representation of the final look and feel. It is best used for functional prototypes requiring tight tolerances, superior material properties, or when testing with production-grade materials is critical.
Actionable Tips for Implementation
To effectively integrate CNC machining into your rapid prototyping techniques, follow these guidelines:
- Design with Standard Tools: Create features that can be machined with standard drill bit and end mill sizes. This avoids the high cost and long lead times associated with custom tooling.
- Specify Realistic Tolerances: Only apply tight tolerances to critical features where precision is non-negotiable. Over-tolerancing dramatically increases machining time and cost.
- Minimize Setups: Design parts that can be machined from as few orientations as possible. Each time a part must be re-fixtured, it adds labor costs and introduces potential for error.
3. Injection Molding (Rapid Tooling)
Bridging the gap between prototyping and full-scale production, rapid injection molding is a powerful technique that uses quick-turnaround molds, typically made from aluminum or soft steel. Instead of waiting weeks or months for traditional hardened steel tooling, this approach allows for the creation of hundreds or thousands of production-quality parts in a matter of days. This technique is ideal for validating a design's manufacturability and testing market viability with real, end-use materials.
How It Works and When to Use It
The process mirrors traditional injection molding: molten thermoplastic resin is injected under high pressure into a mold cavity, where it cools and solidifies into the final part. Its primary advantage is speed and cost-effectiveness for low-to-mid volume runs. Use rapid tooling when you need to test snap-fit assemblies in consumer electronics, produce a pilot batch of medical devices for clinical trials, or create initial inventory for a crowdfunding campaign. It allows for rigorous functional testing using the same materials and manufacturing process as mass production.
Actionable Tips for Implementation
To successfully leverage this rapid prototyping technique, keep manufacturability in mind from the outset:
- Integrate Draft Angles: Design parts with draft angles, typically 1 to 3 degrees, to ensure they can be easily ejected from the mold without damage.
- Maintain Uniform Wall Thickness: Consistent wall thickness prevents cosmetic defects like sink marks and warping, ensuring part integrity and a professional finish.
- Request a Mold Flow Analysis: Before cutting metal, ask your manufacturer for a mold flow analysis. This simulation can predict how the plastic will fill the cavity and identify potential issues early.
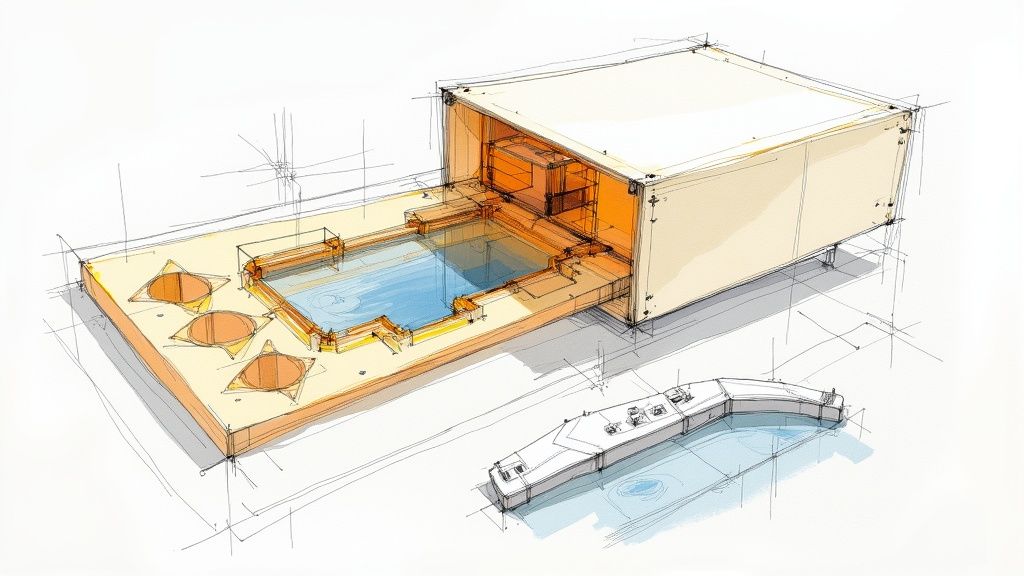
4. Vacuum Casting (Urethane Casting)
As one of the most effective rapid prototyping techniques for producing high-fidelity, short-run parts, vacuum casting (or urethane casting) bridges the gap between single prototypes and injection molding. This process involves creating a flexible silicone mold from a highly finished master pattern, which is then used to cast polyurethane resins under vacuum. The vacuum removes air bubbles, ensuring exceptional detail replication and a flawless surface finish that closely mimics final production parts.
How It Works and When to Use It
The process begins with a master pattern, often created using 3D printing (SLA) or CNC machining. This pattern is suspended in liquid silicone to create a mold, which is then cured and cut open. Polyurethane resin is poured into the mold cavity inside a vacuum chamber to produce bubble-free copies. Vacuum casting is ideal for creating small batches (15-25 parts per mold) for market research samples, aesthetic validation, and functional testing. For instance, an electronics company might use it to produce realistic enclosures for trade show demos.
Actionable Tips for Implementation
To maximize the benefits of vacuum casting for your projects, follow these tips:
- Invest in a High-Quality Master Pattern: The quality of the final cast parts is directly dependent on the master pattern. Ensure it has a smooth, blemish-free surface finish.
- Plan Parting Lines Carefully: Work with your supplier to define the mold's parting line to minimize visible seams on the final parts, especially for aesthetic components.
- Request Material Samples: Urethane resins can simulate a wide range of production plastics (from rigid to flexible). Request samples to validate the material properties meet your application's requirements before committing to a batch.
5. Sheet Metal Fabrication
Among the most robust rapid prototyping techniques for creating durable metal parts, sheet metal fabrication converts flat sheets of metal into three-dimensional structures. This method relies on CNC-controlled processes like laser cutting, bending, punching, and forming to quickly produce strong, functional prototypes. It is indispensable for developing products such as enclosures, brackets, and chassis where the final part will be made from metal.
How It Works and When to Use It
The process begins with a CAD file, which guides machinery to cut a flat pattern from a metal sheet. This pattern is then precisely bent or formed into its final shape. Sheet metal is the ideal choice when you need prototypes with high strength and durability, closely mimicking mass-produced metal parts. Use this technique for prototyping electronics enclosures, automotive mounting components, and industrial equipment frames that require the specific mechanical properties of materials like steel, aluminum, or stainless steel.
Actionable Tips for Implementation
To effectively use sheet metal fabrication for your prototypes, focus on these design-for-manufacturing principles:
- Use Standard Bend Radii: Design bends with a radius equal to the material's thickness. This common standard prevents cracking and simplifies the manufacturing setup.
- Incorporate Bend Relief: Add small cuts or reliefs at the edge of a bend line. This step prevents the material from tearing and ensures clean, accurate corners.
- Design for Standard Gauges: Stick to common, standard sheet metal thicknesses. This reduces material costs and ensures your chosen material is readily available for faster turnaround.
6. Paper Prototyping
Paper prototyping is a foundational low-fidelity technique where interfaces and user experiences are sketched out using simple materials like paper, pens, and scissors. Instead of code or complex software, designers create tangible, hand-drawn mockups of screens, buttons, and interactions. This method is incredibly effective in the earliest stages of design for validating core concepts and user flows before a single line of code is written or a digital wireframe is created.
How It Works and When to Use It
In a paper prototyping session, one person acts as the "human computer," manually changing paper screens in response to a user's actions. This approach is ideal for testing the fundamental logic and usability of an app or website's navigation. Companies like Dropbox famously used paper prototypes to validate user flows before committing to development. It is the go-to method for quick, collaborative brainstorming and gathering immediate user feedback on an idea’s core value, making it one of the most accessible rapid prototyping techniques.
Actionable Tips for Implementation
To make the most of this rapid prototyping technique, consider these strategies:
- Focus on Key User Flows: Don't try to replicate every feature. Concentrate on testing the primary tasks a user needs to accomplish to see if the core concept is intuitive.
- Use Color to Differentiate: Assign different paper colors to represent distinct screens, states, or interactive elements. This helps users and facilitators keep track of the flow.
- Test with Real Users Early: The value of paper prototyping comes from real user interaction. Even at this rough stage, observing how users navigate your paper interface provides invaluable insights.
7. Digital Prototyping and Wireframing
In the realm of software and digital products, digital prototyping stands out as a critical rapid prototyping technique. It involves creating interactive, clickable mockups of applications or websites using tools like Figma or Adobe XD. This method allows designers and stakeholders to simulate the user experience, test navigation flows, and validate interface designs before a single line of code is written, drastically reducing development waste and rework.
How It Works and When to Use It
Digital prototyping ranges from low-fidelity wireframes, which are basic schematic layouts, to high-fidelity, visually polished simulations that feel like the final product. Low-fidelity is perfect for early-stage brainstorming and validating core structure, while high-fidelity is used for user testing and getting final sign-off. This technique is indispensable for any project involving a user interface. For example, Spotify validates new features with interactive Figma prototypes, allowing them to gather user feedback on functionality and usability early in the user interface design process.
Actionable Tips for Implementation
To effectively use digital prototyping and wireframing, follow these best practices:
- Start Low-Fidelity: Begin with simple wireframes to solidify the information architecture and user flow without getting distracted by visual details like colors or fonts.
- Test with Real Users: Go beyond internal stakeholders. Testing prototypes with actual target users provides invaluable insights into usability issues you might have missed.
- Use Real Content: Whenever possible, replace "lorem ipsum" placeholder text with realistic content. This helps to reveal design constraints and ensures the layout works with actual data.
8. Wizard of Oz Prototyping
Wizard of Oz prototyping is a unique user experience testing technique where participants interact with what they believe is a fully autonomous system, but in reality, a human operator (the "wizard") is manually controlling the system's responses from behind the scenes. This method allows teams to gather authentic user feedback on complex interfaces, AI-powered features, or voice assistants before investing heavily in the underlying technology. It’s named after the character in The Wizard of Oz who operated his machinery from behind a curtain.
How It Works and When to Use It
This technique is invaluable for validating user experience for systems that are technologically complex or not yet built. A human operator mimics the intended system's logic and responses based on user inputs. It is especially effective for testing chatbot conversation flows, validating smart home voice commands, or assessing the user interface for autonomous vehicles, where a human can ensure safety while simulating advanced AI behavior. Zappos famously used this method to test its e-commerce model by manually purchasing shoes from local stores to fulfill initial orders.
Actionable Tips for Implementation
To effectively use Wizard of Oz as one of your rapid prototyping techniques, consider these strategies:
- Establish Clear Protocols: Create a detailed script or a set of rules for the "wizard" to follow. This ensures responses are consistent and accurately reflect the proposed system's capabilities and limitations.
- Focus on Realistic Delays: The wizard's response time should mimic the expected processing speed of the final technology. Instantaneous human responses can set unrealistic user expectations for the final product.
- Debrief Participants: Be transparent with users about the methodology after the test is complete. This is an ethical practice that also provides an opportunity to gather deeper qualitative insights about their experience.
9. Foam and Clay Modeling
Long before digital tools dominated the field, foam and clay modeling was the quintessential rapid prototyping technique for exploring physical form and ergonomics. This hands-on method involves sculpting materials like high-density foam, industrial plasticine clay, or modeling compounds to create full-scale or scale models. It remains invaluable in industrial and automotive design, where tactile feedback and an intuitive feel for proportions are critical to the creative process.
How It Works and When to Use It
Designers manually carve, shape, and smooth foam or clay to bring a concept to life. High-density foam is often used for blocking out major forms, while clay allows for subtle, continuous refinement of surfaces. This technique is ideal during the earliest stages of ideation to evaluate ergonomics, aesthetics, and overall physical presence. Automotive studios like Ford and Toyota build full-size clay models to perfect vehicle lines, while consumer product companies like Dyson and Apple use foam models to test the feel of a new vacuum handle or phone chassis.
Actionable Tips for Implementation
To effectively integrate this classic prototyping method into your workflow, consider these strategies:
- Establish Proportions First: Begin with rough foam blocks to quickly establish the primary dimensions and overall volume of your design before moving to finer details.
- Bridge Physical and Digital: Use a 3D scanner to capture your finished foam or clay model. This creates a digital CAD file that can be used for further refinement, analysis, or creating molds.
- Test with Users Early: The primary benefit is tactile feedback. Place the physical models in the hands of target users to gather immediate, real-world feedback on comfort, grip, and overall usability.
10. Functional Prototyping with Development Boards
One of the most effective rapid prototyping techniques for electronics is using development boards like Arduino, Raspberry Pi, or ESP32. This approach allows developers to quickly build and test the functional core of a product, such as its sensors, connectivity, and user interactions, without the high cost and long lead times of designing custom printed circuit boards (PCBs). It is foundational for creating proofs-of-concept for IoT devices, wearables, and other smart products.
How It Works and When to Use It
This method involves using off-the-shelf single-board computers or microcontrollers as the "brain" of a prototype. Engineers connect sensors, displays, motors, and other components using breadboards and jumper wires, then write code to control the hardware. It is the ideal choice when the primary goal is to validate electronic functionality and software logic. For instance, an industrial IoT sensor can be prototyped using a Raspberry Pi to test data collection and cloud communication before committing to a final hardware design. This technique is a crucial early step in the product development process for any embedded system.
Actionable Tips for Implementation
To maximize the effectiveness of this prototyping method, follow these strategies:
- Choose the Right Platform: Use Arduino for simple sensor and motor control, a Raspberry Pi for tasks requiring more computational power like image processing, and an ESP32 when Wi-Fi and Bluetooth connectivity are priorities.
- Start with Example Code: Leverage the vast libraries and example projects available for these platforms. Start with a working example and modify it incrementally to fit your specific needs, which saves significant development time.
- Plan for Power Early: Always consider power consumption from the beginning, especially for battery-operated devices. Measure the current draw of each component to accurately estimate battery life and select an appropriate power source.
Rapid Prototyping Techniques Comparison Guide
| Prototyping Method | Implementation Complexity 🔄 | Resource Requirements | Expected Outcomes 📊 | Ideal Use Cases 💡 | Key Advantages ⭐ |
|---|---|---|---|---|---|
| 3D Printing (Additive Manufacturing) | Moderate 🔄🔄 | 3D printer, CAD files, materials (plastics, metals) | Physical parts with complex geometries | Low-volume parts, complex shapes, rapid iteration | Design freedom, minimal waste, no tooling needed |
| CNC Machining | High 🔄🔄🔄 | CNC machine, tooling, production-grade materials | High-precision, strong functional parts | Functional prototypes, metal parts, tight tolerances | Superior accuracy, production-grade materials |
| Injection Molding (Rapid Tooling) | High 🔄🔄🔄 | Tooling (aluminum/soft steel molds), plastics | Production-like plastic parts in batches | Medium volumes (50-10,000 parts), design validation | Production materials, cost-effective for mid volumes |
| Vacuum Casting (Urethane Casting) | Moderate 🔄🔄 | Silicone molds, polyurethane resins | High-quality plastic parts, good surface | Small batch plastic parts (5-50 units), detail focus | Low cost for small runs, excellent surface finish |
| Sheet Metal Fabrication | Moderate 🔄🔄 | CNC laser/punch machines, various metals | Metal enclosures, brackets, chassis | Structural components, enclosures, brackets | Fast turnaround, cost-effective, production materials |
| Paper Prototyping | Low 🔄 | Paper, cardboard, markers, scissors | Low-fidelity, conceptual models | Early-stage design, user flow testing, workshops | Extremely low cost, fastest iteration, inclusive |
| Digital Prototyping & Wireframing | Low to moderate 🔄🔄 | Software tools (Figma, Adobe XD), computers | Interactive digital prototypes | UX/UI design, apps, websites | Fast iteration, interactive, easy sharing |
| Wizard of Oz Prototyping | Moderate 🔄🔄 | Human operator, simulated system setup | User-tested concepts without full backend | AI, voice UI, chatbot testing | Flexible, cost-effective validation of complex systems |
| Foam and Clay Modeling | Moderate 🔄🔄 | Foam, clay, hand tools | Physical form models, ergonomic prototypes | Form studies, ergonomic validation | Hands-on tactile feedback, organic shapes |
| Functional Prototyping with Dev Boards | Moderate 🔄🔄 | Development boards (Arduino, Raspberry Pi), sensors | Working electronic prototypes | IoT devices, embedded systems, sensor testing | Fast electronics prototyping, low cost, flexible |
Building the Future, One Prototype at a Time
The journey from a nascent idea to a tangible, market-ready product is paved with iterations, tests, and invaluable learning experiences. As we've explored, the diverse landscape of rapid prototyping techniques provides a powerful toolkit for innovators across every industry. From the tactile feedback of foam and clay models to the high-precision reality of CNC machining, each method offers a unique lens through which to view, test, and refine your vision. The true mastery lies not in championing a single technique, but in strategically selecting the right tool for the right stage of your development lifecycle.
The core principle unifying these methods is the pursuit of knowledge. A simple paper prototype can invalidate a flawed user flow in minutes, saving weeks of development. A 3D printed model can reveal ergonomic issues that were invisible on a screen. A functional prototype built with a development board can prove technical feasibility long before committing to expensive custom hardware. This iterative process is the engine of modern innovation, transforming assumptions into data-backed decisions.
From Theory to Tangible Results: Your Prototyping Roadmap
The ultimate goal is to create a seamless, efficient feedback loop. Your path forward should be guided by a clear understanding of what you need to learn at each step. This means embracing a blended approach, moving fluidly between fidelity levels as your project matures.
- Early Stage Validation (Low-Fidelity): Start with methods like Paper Prototyping, Wizard of Oz, and Digital Wireframing. Your primary goal here is to test core concepts, user flows, and value propositions with minimal investment. Ask big questions and be prepared to pivot based on user feedback.
- Mid-Stage Refinement (Mid-Fidelity): As concepts solidify, transition to techniques like 3D Printing or Vacuum Casting. These methods are ideal for creating look-alike or feel-alike models to test ergonomics, aesthetics, and form factor. They provide stakeholders and test users with something tangible to interact with, generating deeper, more specific insights.
- Late-Stage Testing (High-Fidelity): For pre-production validation, high-fidelity methods such as CNC Machining, Rapid Tooling for Injection Molding, and Functional Prototyping are indispensable. This is where you test for manufacturability, material performance, and real-world functionality to ensure your design is robust and ready for mass production.
The Power of Prototyping is the Power of Learning
Ultimately, embracing these rapid prototyping techniques is about more than just building faster; it's about learning smarter. Each prototype, regardless of its fidelity, is a conversation with your future user and a critical step toward de-risking your project. By failing early and inexpensively, you clear the path for a successful, impactful launch. The future is not built in a single, perfect leap; it is assembled, tested, and perfected one prototype at a time.
Ready to accelerate your digital prototyping phase? A polished user interface begins with professional, consistent visuals. VibeIcons provides a massive, beautifully crafted icon library that helps you create stunning, high-fidelity wireframes and digital prototypes in minutes, not hours. Explore our collection and elevate your designs today at VibeIcons.